Pretty Page of Embroidery
Victorian Era Embroidery ~ This pretty page of embroidery patterns is from an 1883 Peterson’s Ladies Magazine.
A popular American woman’s magazine published from 1842 until 1898. I admire it for the fashion plates, articles, stories, recipes and needlework patterns within each one.
Along with Godey’s Ladys Book, Peterson’s magazine was a household name in the 1800’s.
You’ll find advice on working each pattern from the magazine after the image in boxes.
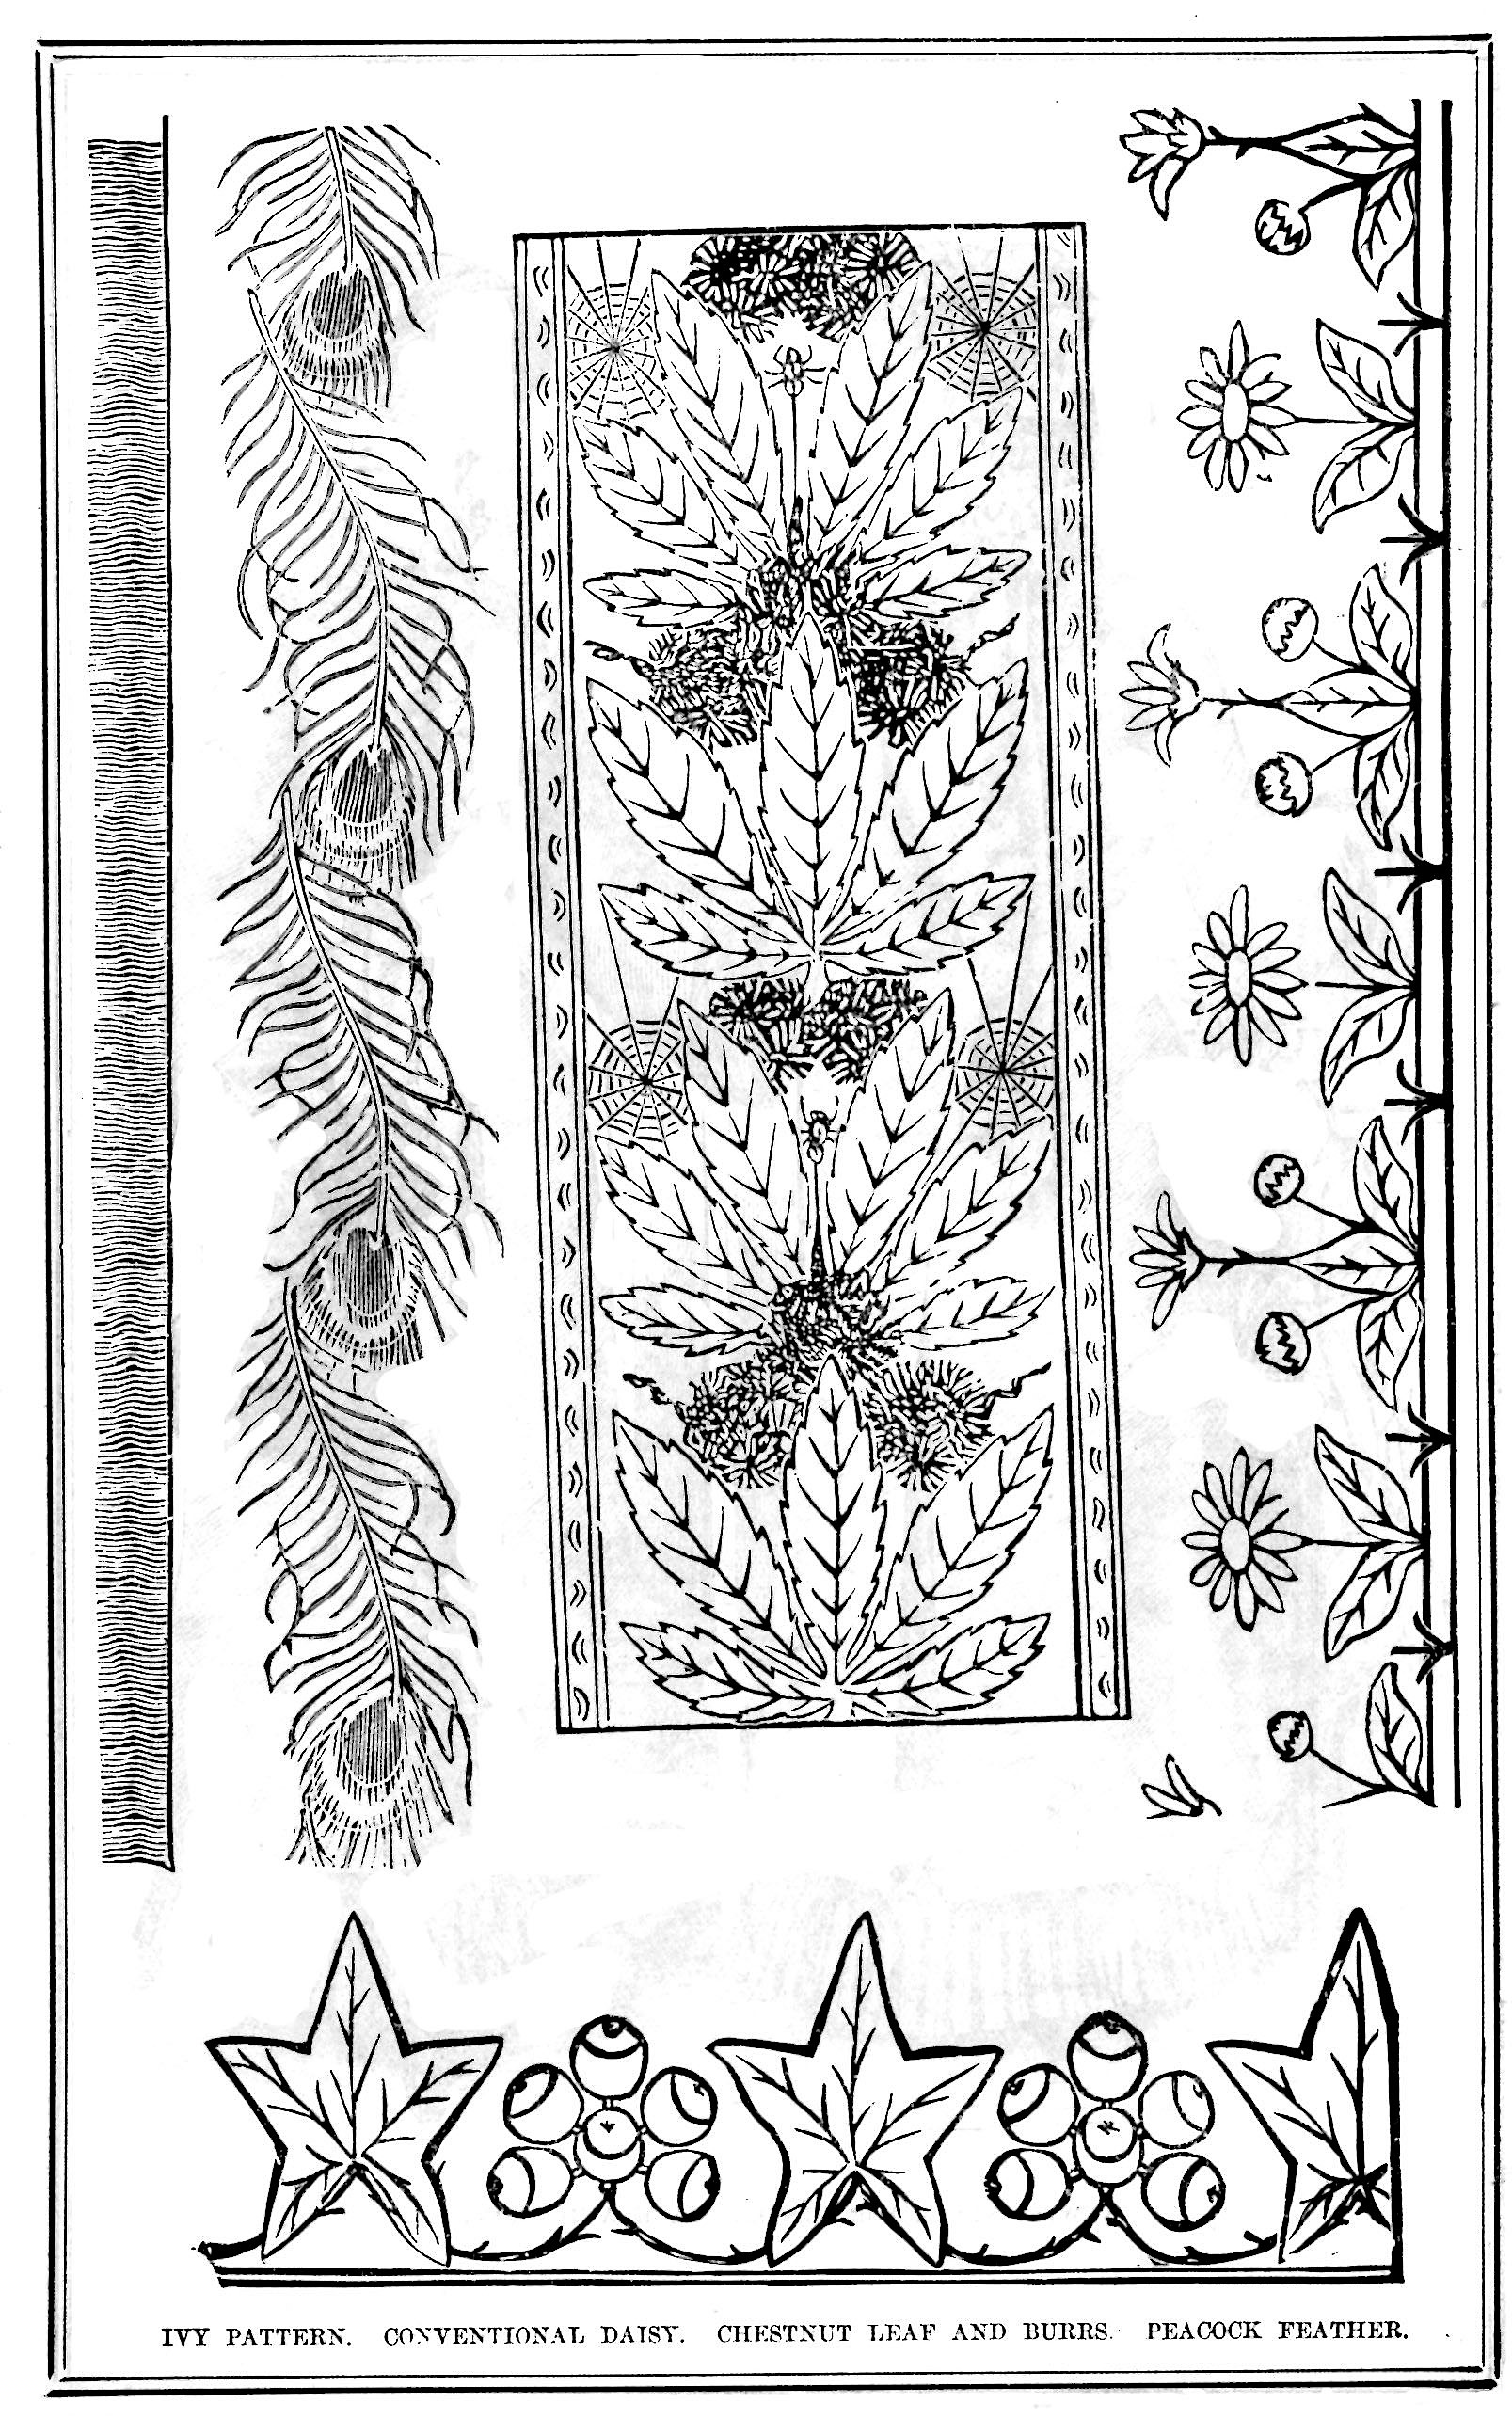
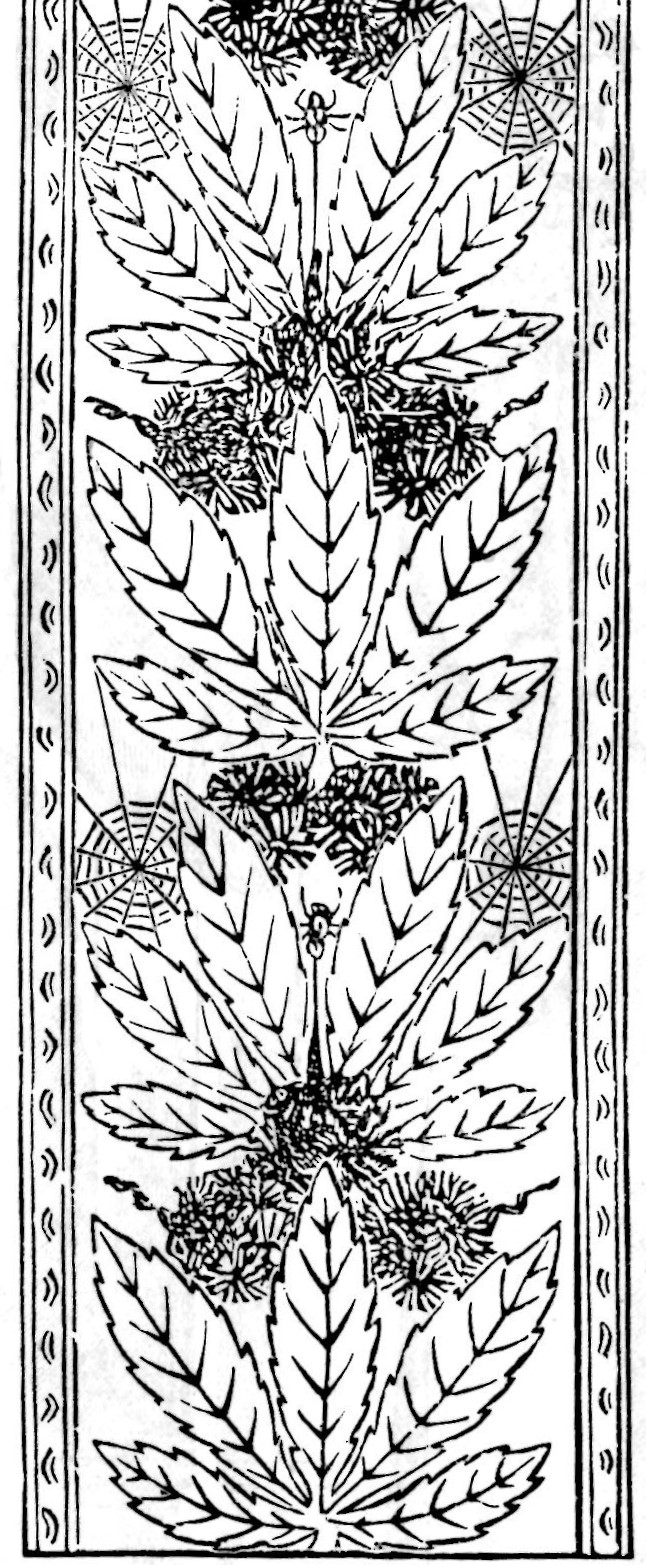
Chestnut Leaves and Burs
Let’s start with the Chestnut Leaves and Burs Victorian era embroidery pattern.
Scaling the Patterns
“The scale on which it is drawn allows one inch to six. It is just two inches wide, therefore, this border, which is intended for a curtain, would be one foot in width.
Place a strip of thin tissue or tracing paper over this design (the Chestnut), and on it rule lines exactly one inch apart, along and across it. Then on the paper to which you desire to transfer the enlarged copy rule lines six inches square, (the narrow borders at each side should be about one and a half inches wide). Into each of these six-inch squares draw exactly as much of the pattern as there is in the corresponding one-inch square of the small design.
By these means, you will get a perfectly correct copy of it on a large scale, which you can then transfer in the usual way to the material.”
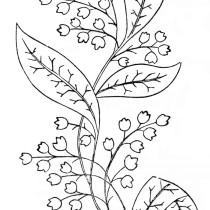
Daisy Pattern
Next is the Daisy pattern border.

“The daisy pattern is a simple border, which can be made any size required. Worked either on crush or cloth, or any not very thick material, either in outline, if small, or solid, if worked larger. In the latter case, it should be done in natural colors.
As it stands now, it would only be sufficiently important for a child’s frock, (in which case the frock might also have powderings of daisies scattered over it, two or three inches apart,) or some small article, such as a work-case or smoking-cap.”
Ivy Pattern
Then there’s an ivy pattern.
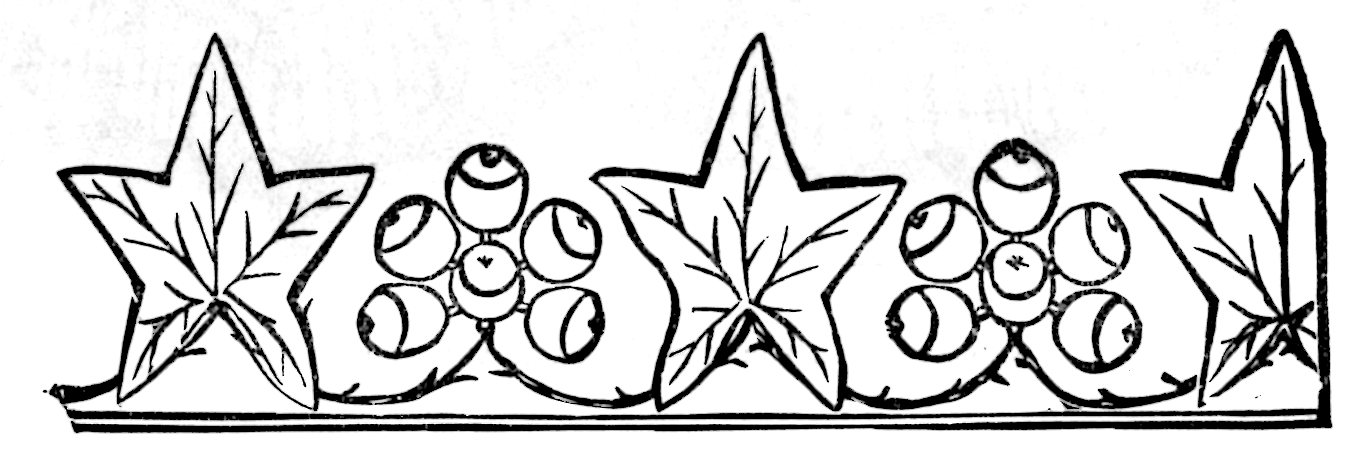
“The pattern of conventionally-arranged ivy and berries would look best with the berries worked solidly. The leaves could be worked solidly or not. The upper division of the berries being dark-brown or black, and the lower blue or olive-green. While the stalks and veins of the leaves can be reddish-brown.”
Peacock Feathers
And last but not least the Peacock Feathers.

“The peacock feather pattern is intended to be enlarged to six inches wide, as a band for a small work or occasional table. For this it can be worked on almost any material, as long as it is not too thick to allow the fine lines of the feathers to show well.
We have seen some most charmingly done on old-gold-colored Roman satin for such a table. To get the colors right for working, and also to make a life-like drawing of the feathers, you must first copy its gracefully curled lines carefully, and then match its colors as nearly as possible in silk or crewel, and keep it by you whilst you work.
Enlarged still more, it would make a border all around an afternoon tea-cloth on crush. If the self-made fringe had needlefuls of the various colored silks you have used in working the feathers, the effect would be very pretty and harmonious.
This method of finish may also be used with a border of bought fringe of plain crewel, but it need not then be so freely introduced, a few threads of filoselle here and there having the same effect in the fringe that putting in the lights with silk has in the work.
You can also adapt the border to the dress or a child’s frock. Any size you like, and for the latter especially it would be very pretty.”
The Full Page of Images
All the images of the Victorian era embroidery are in JPG file format so you’ll be able to resize and manipulate them however you’d like in a photo editing program.
Download Instructions for All Images: Right-Click on the image. Select either “save link as” or “save image as” depending on what browser you are using. Or simply click on it, it will open in a new window and save it from there.
If you like this post, be sure to share it with your friends and like our Facebook Page so you can get updates every time we post new patterns.
Enjoy!
This post may contain affiliate links. If you make a purchase after clicking on these links, I will earn a small commission, which helps to keep the content free. Read my full disclosure policy.