
Embroidery Hints and Tips ~ The ancient craft of embroidery is being celebrated this month. Ancient, because examples of surviving Chinese chain stitch embroidery worked in silk thread have been dated to the Warring States period (5th-3rd century BC ).
When you think of embroidery there are many words that come under it’s heading. Such as, Cross Stitch, Hardanger, Redwork, Berlin Work, Crewel, Needlepoint, and Smocking just to name a few.
Most of the time embroidery is done by hand, but the computerized embroidery machines available today provide wonderful designs to choose from and the machine does all the work.
Embroidery Hints and Tips
I’ve selected some great patterns to share, but first here are some hints and tips about embroidery you’ll need to know before you get started:
EMBROIDERY THREADS . . . Your choice of threads will depend upon the type of embroidery on which you intend to work. Mercerized threads may be used on most light weight fabrics. Heavier cotton thread produces a rich and unusual effect in certain designs. Wool is suitable for use on heavier fabrics.
All embroidery threads should be boil fast. To work with inferior materials and threads is a foolish waste of time. When the working thread begins to acquire a fuzz or becomes untwisted, take a new one.
EMBROIDERY NEEDLES . . . The needle with which you embroider opens the weave of the material to enable the embroidery thread to slide through easily. Therefore, when you choose an embroidery needle, the eye should be slightly larger than the thickness of the embroidery thread. Almost all embroidery needles have a much longer eye than sewing needles. The needle ordinarily used is called a crewel needle. The length of the average embroidery needle is about 1¾ inches. A longer needle hinders the worker in gaining speed.
SCISSORS . . . Embroidery scissors should be about 4 to 5 inches long and should have very sharp points.
Finishing, Pressing, Frames
BEGINNINGS AND FINISHINGS . . .The wrong side of the work should look equally as well as the right side. To begin a piece of embroidery do not use a knot, but make a close running stitch toward the starting point, then make a small back stitch and begin to embroider in the direction specified.
To end your thread, weave the needle in and out of the material under the piece which has just been completed, but do not allow your needle to pick up any of the embroidery stitches. When you feel that the end of the thread is perfectly secure, cut the thread close to the embroidery. Do not carry your thread from one design to the other, as this produces very untidy work.
PRESSING . . . All embroidery should be pressed on a thickly padded surface. The raised face of the embroidery sinks into the softness of the padding and is not flattened by the iron. Place the embroidery piece wrong side up. Cover with a damp cloth. With a moderately hot iron press heavily. Remove the damp cloth and iron until dry. Turn work, and on right side iron only the hems.
FRAMES . . . There are several types of embroidery frames. The hand frames are most common. They come in two shapes, round and oval. Tighten a frame over a small area of fabric and the material is held taut and cannot pucker. Larger frames for larger pieces are also available and fit almost any size or type of embroidery.
Stitches and Transferring
I’ve provided a print out of the most basic embroidery stitches here: Important Embroidery Stitches
You’ll also find several good videos demonstrating how to do the stitches on YouTube. Just search ’embroidery stitches by hand’ and you’ll find more than enough to choose from. To start here’s a YouTube Video Tutorial of basic stitches.
TRANSFERRING . . . Once you’ve printed out the patterns there are several options for transferring. Some are:
A light table or sunny window where you tape the design down then trace it lightly onto your fabric.
Good old carbon paper, but this may smudge on your fabric.
A sewing tracing wheel and paper.
Some craft stores carry iron on transfer material you can run through your printer.
Embroidery Patterns
PATTERNS . . . The first pattern is from the 1800’s and is a delicate floral design for a collar and cuff. With this pattern you’ll be able to pick and choose the colors you’d like to use and make it your own. Embellishing a little girl’s dress or the corner of a hankie would be very pretty.
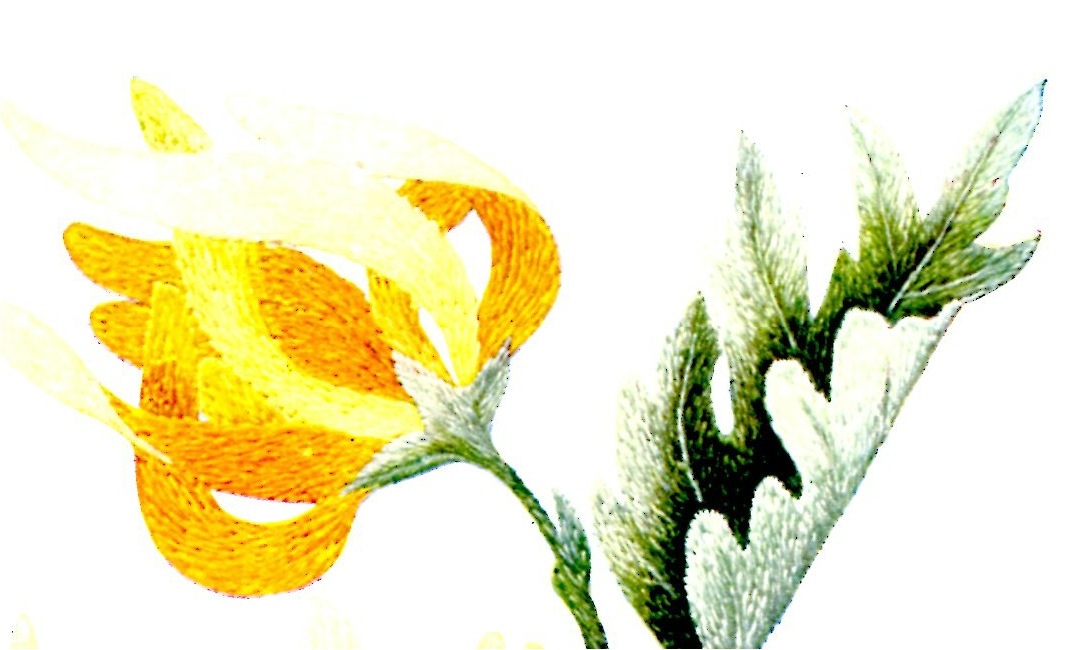
The next is from the early 1900s and is a beautiful Yellow Chrysanthemum Pattern. Along with the colored picture is the detail of stitch directions and color placing. There’s a diagram of shades, but the coordinating numbers for the silk thread are probably no longer available, so you’ll have to choose your own.
Here’s a pretty page of cross stitch embroidery patterns. This is in color so you can match the thread accordingly. The size of your design will be determined by what size your even weave fabric is.
If you like this post, be sure to share it with your friends. And like our Facebook Page to get updates every time we post new patterns.
Enjoy!
This post may contain affiliate links. If you make a purchase after clicking on these links, I will earn a small commission. This helps to keep the content free. Read my full disclosure policy.