Heirloom Embroidery
Who doesn’t love those heirloom baby and wedding items made using Hardanger embroidery? So dainty and beautiful, and if you know how to do a satin stitch, really not that hard to do.
Hardanger embroidery or “Hardangersøm” is a form of embroidery traditionally worked with thread on even-weave cloth. It uses counted thread and drawn thread work techniques.
Hardanger got it’s name from the women of the Town of Hardanger in Norway. They were experts in this type of embroidery. Although the modern form of the work originated in Norway, you can find the same stitches on the wonderful embroideries of ancient Persia and Asia.
Equipment for Hardanger embroidery work is simple. They consist of very sharp pointed scissors, embroidery thread and crewel needles. The best material is woven with a square, even mesh.
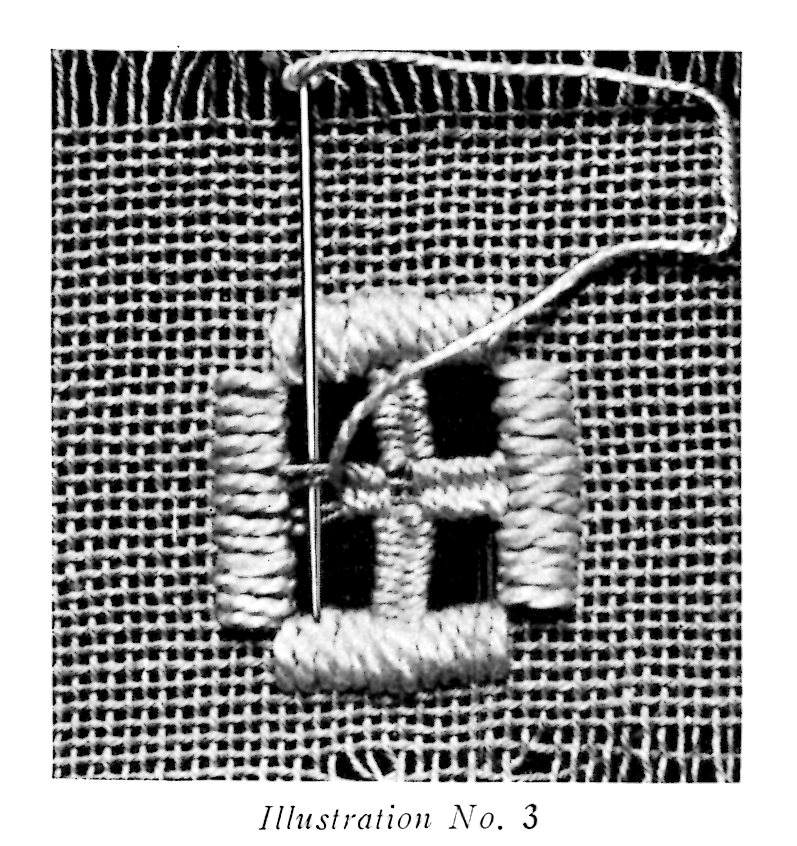
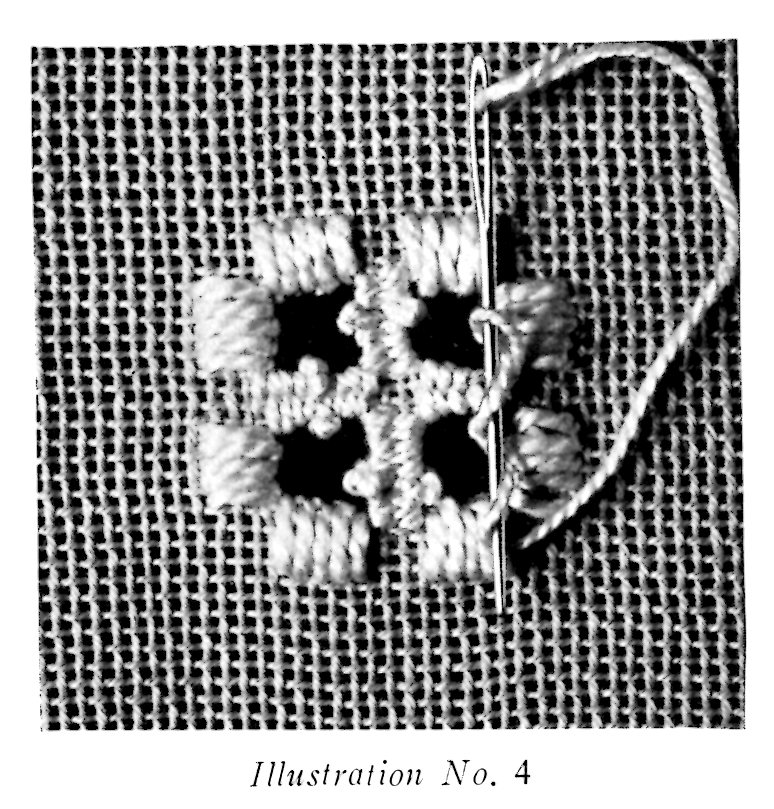
Kloster Stitch Block
Before cutting the threads for drawnwork, all outlining or Kloster stitch blocks are done. It’s best to do the large spaces first, working down to the smaller details.
Heavier thread is usually used for the Kloster or Satin Stiches. And finer thread for weaving and filling in stitches.
Kloster stitch is generally worked over four threads and there are always five stitches for each single block, with four stitches added for each consecutive block.
 Satin stitch is only worked over less than four threads when it is not depended upon as an outline for cut work.
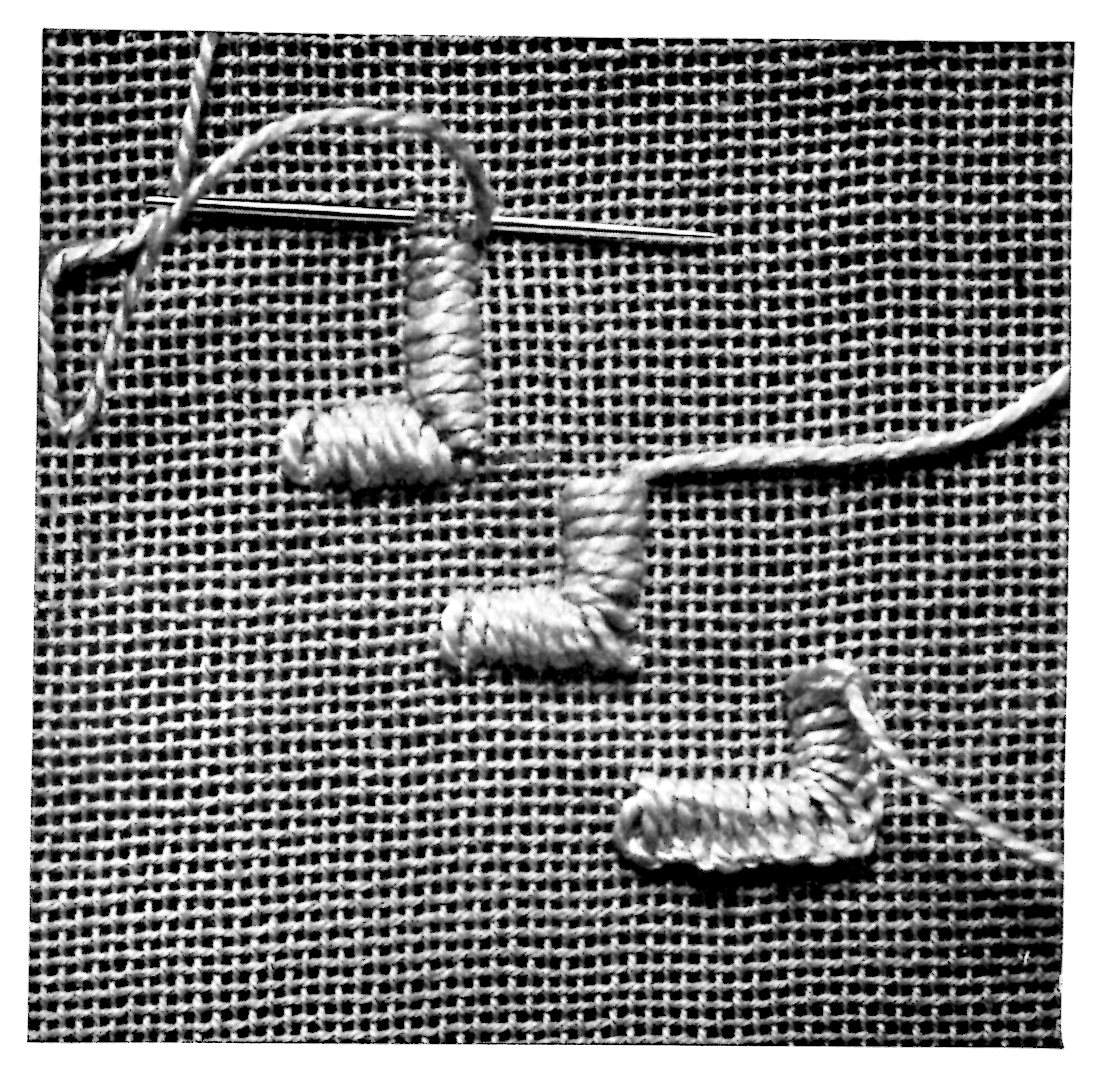
Picots
To add Picots to the bars, work half way down, take the end of thread attached to work and twist it around the needle three times, hold in place and draw the needle through, pulling the thread tight and finish weaving the bar.
Below is an example of using the Kloster stitch over eight threads. The center five stitches are over eight threads. Four stitches on either side to give balance.

More Kloster stitches:

Use the stitches above as a decorative stitch on the material and not for the edge of cut work.
Forming Corners
There are several ways of forming corners. In the illustration below, the first two are used to form straight edges on either side of a Hardanger design. It’s simply a choice as to whether a mitered or diagonal corner is used, since they are usually a decorative stitch. The buttonhole edge and corner adds strength for use with a cut away design.
This 4½ minute video on YouTube, Beginning Hardanger explains visually how to begin Hardanger embroidery.
The PDF file you can download for later is an article, Fundamental Stitches of Hardanger Embroidery that comes from a 1920’s Star Needlework Journal magazine.
Stitches of Hardanger Embroidery PDF
The article is in pdf format so to read it you’ll need the Adobe Reader software on your computer. Most computers come with it, but it is free and can be found here.
Download Instructions: Right-Click on the image. Select either “save link as” or “save image as” depending on what browser you are using. Or simply click on it, it will open in a new window and save it from there.
If you like this post, be sure to share it with your friends and like our Facebook Page so you can get updates every time we post new patterns.
Enjoy!
This post may contain affiliate links. These affiliate links help support this site. For more information, please see my disclosure policy.