A Vintage Tea Apron
Today’s vintage tea apron sewing pattern instructions are from a 1925 Star Needlework Journal magazine Volume 10 Number 1. The American Thread Co. published the magazine quarterly. You could have a yearly subscription mailed to you for 40 cents or pay 10 cents for a single copy.
No Pattern, but Materials and Instructions
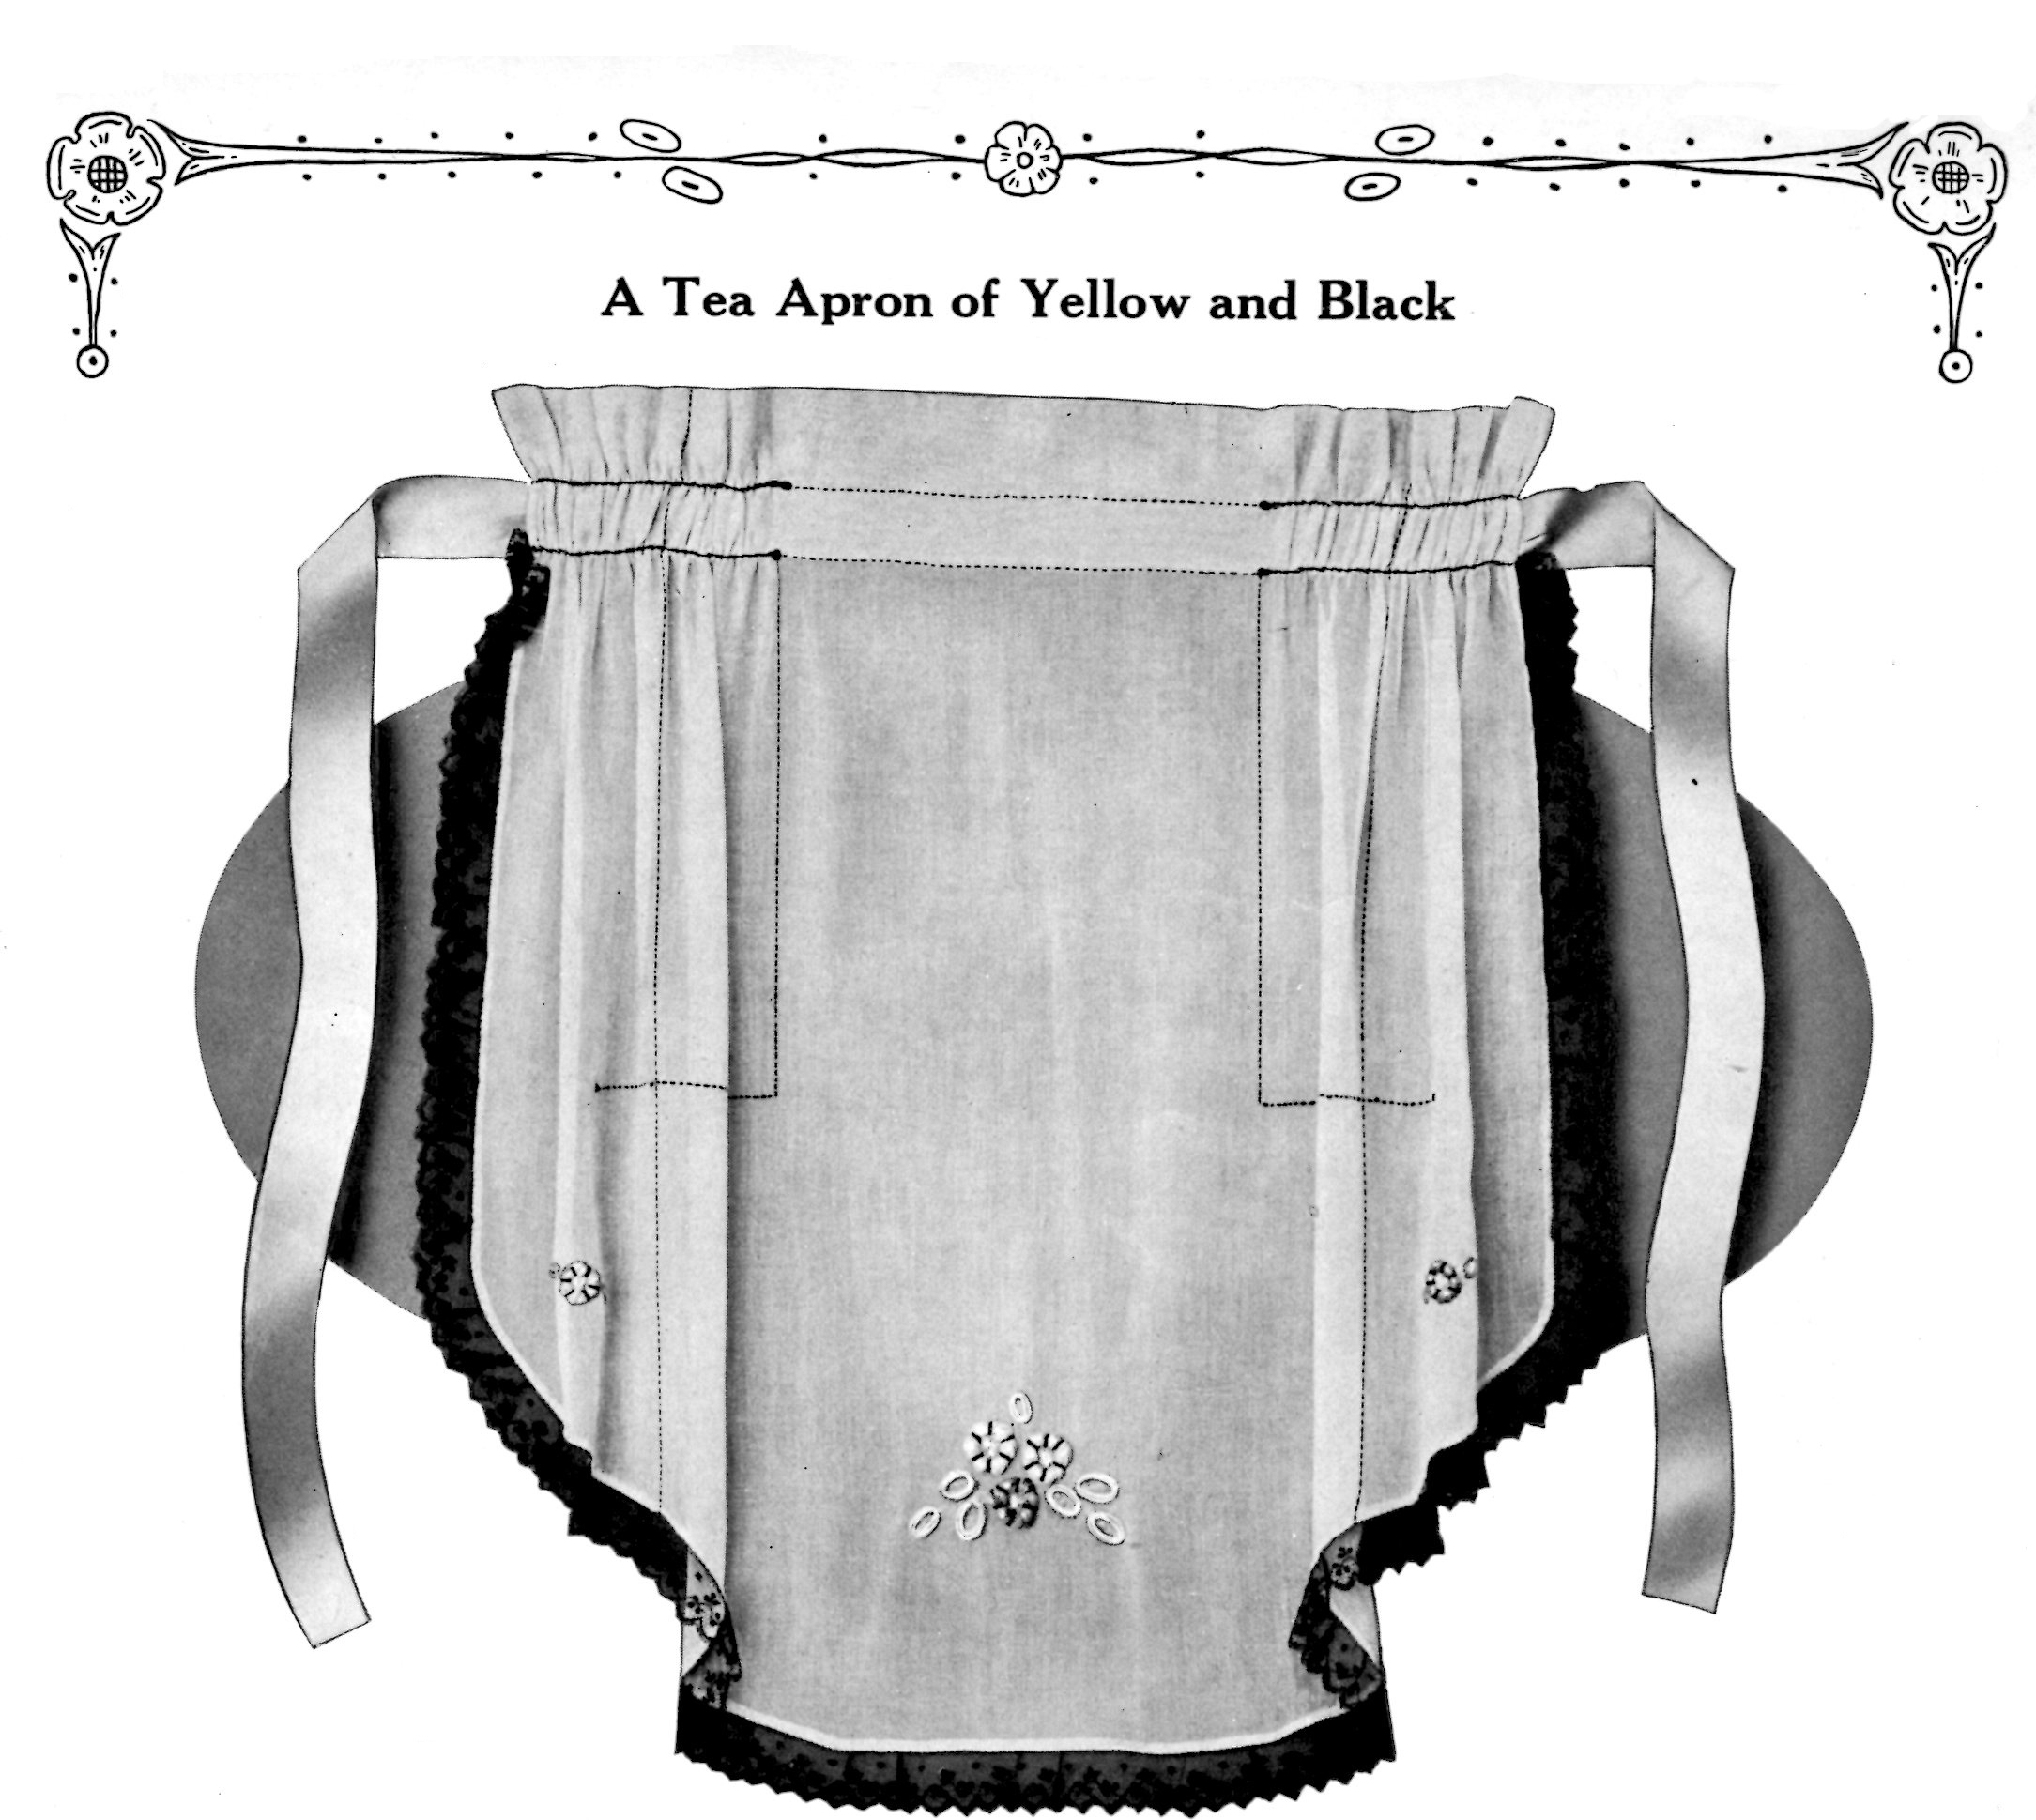
Actual pattern pieces are not included for this tea apron but instead there is a list of materials required and instructions for sewing. The photo is in black and white, but the true colors are yellow with a black lace trim. Very 1920’s.
Embroidery Design
For embellishment an embroidery design is included. A simple but fun design to play with.

If you’d like to download the embroidery design, right click on the image to save it.
Just 3/4 yard of 36 inch yellow voile (soft, sheer fabric) material is used. 2¼ yards of black lace and 1¼ yards of ribbon for the tie. The bottom of the apron has a curved shape. When complete the apron is 23 inches long and 27 inches wide. Try a stronger material or make it bigger, it could easily be done.
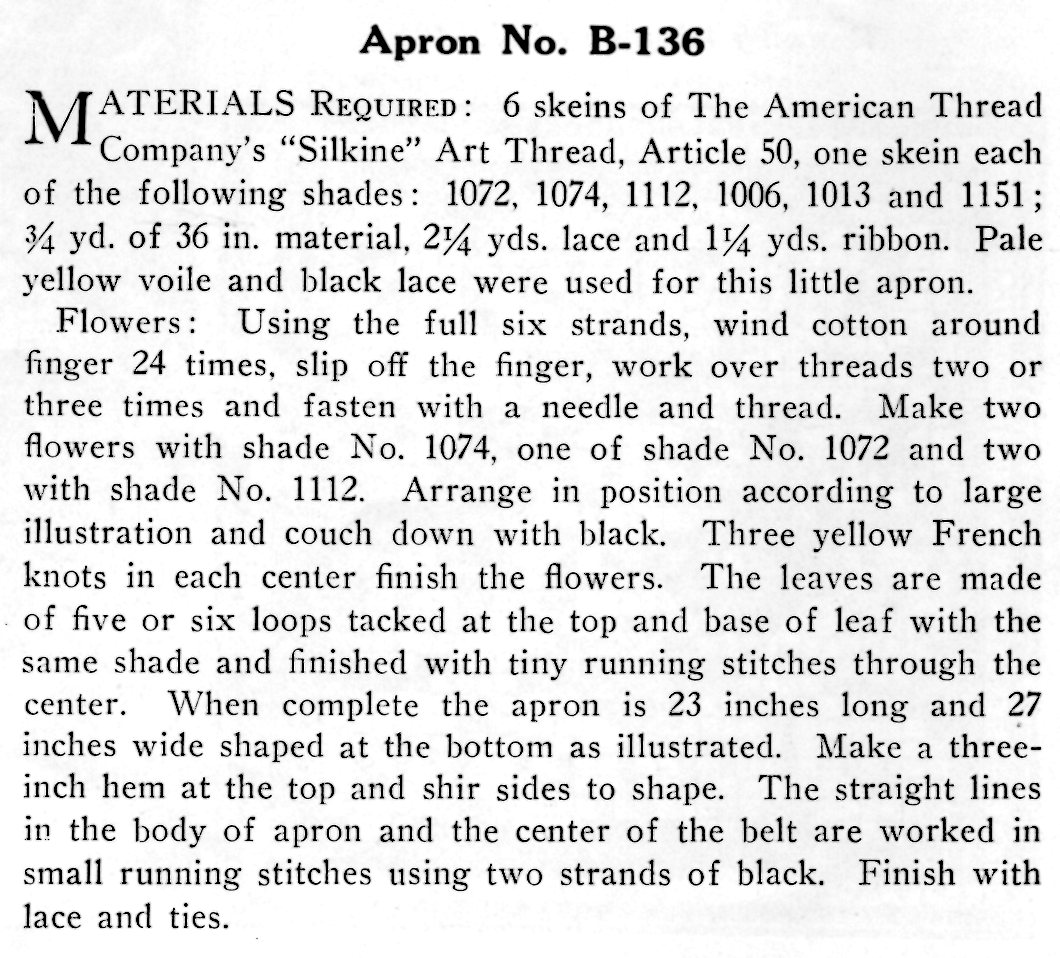
A three inch hem is sewn at the top and the sides are shirred (technique that takes a regular piece of fabric and shrinks it up, giving it elasticity) shape. Two strands of black embroidery thread and a small running stitch make up the straight lines on the apron.
Shirring Tips
The Craftsy blog has a Shirring Tips for Beginners post that has some good pointers and Seamingly Smitten has a tutorial on How to Shir Fabric with elastic thread.
Does anyone have some ideas about sewing this apron, changing the size or shirring fabric, please let us know in the comments below.
Link to a Garden Apron
I’ve featured another apron to sew in a previous post you can use to gather garden fruits and vegetables. It also doesn’t have a pattern, only sewing instructions with an illustration.
Here’s the one page PDF file for the 1925 Tea Apron:
Star Needlework Journal – Tea Apron
The pattern is in PDF format so to read it you’ll need the Adobe Reader software on your computer. Most computers come with it, but it is free and can be found here.
Download Instructions: Right-Click the link and select either “save target as” or “save link as” depending on what browser you are using or simply click on it and save or print.
If you like this page, be sure to share it with your friends and like our Facebook Fanpage so you can get updates every time we post new patterns.
Enjoy!
This post contains affiliate links. For more information, please see my disclosure policy.

“Does anyone have some ideas about sewing this apron, changing the size or shirring fabric….”
My mother and aunts all had cedar chests full of these little numbers made in varying textiles ranging from cotton to organza. They are intended to be a One-Size-Fits-All kind of thing, so adjusting the size wouldn’t be necessary except in extreme cases.
The shirring or gathers at the sides of this apron are achieved by using the ribbon waist band like a draw-string. The apron is more or less finished without any gathers, but includes a narrow channel slightly wider than the width of the ribbon. Once the ribbon has been threaded through the channel and tacked in place to the right and left of center, gathers on either side can be adjusted as required. It says “make a three inch hem at the top and shir sides to shape.” With finished dimensions at 13” x 27”, I take this to mean you start with a rectangle of fabric approximately 16.5” long and 40” wide (possibly 45” because this is a standard width for textiles sold by the yard, making this a 1/2 yard purchase of supply material giving you and extra 1.5” to use for correcting the grain).
Broken down, that gives you:
-From top to bottom, 13” for the front of the apron plus 1/4” of seam allowance on top and bottom, as well as 3” required for the hem at the top.
-From side to side, 13.5” that would remain un-gathered accord the center front (6.75” on either side of center) and 26.5”- 31.5” split two ways for the gathered portions on either side.
Rounding off the bottom corners completes the basic pattern. Lace trim or a rolled hem finishes the sides and bottom edges in one step.
Turn and press 1/4” of seam allowance at the top edge then turn and press again 3” more. This fold makes the top hem as well as the channel for the ribbon. Top stitch the hem at the first fold (just under 3” from the top edge). Run a second row of parallel stitches slightly closer to the top edge that the width of you ribbon. Once the ribbon is threaded through the channel and layer flat anchor it in place on either side approximately 6.75” from the center front. Voila!!! The gathers will be free to slide along the ribbon as necessary.
When worn, this apron will wrap all the way around most slender people with the gathers at the back, leaving the front flat. The point of transition from flat to gathered represents the “side seam” locations. Sizing adjustments should be made in this location borrowing more slack from the gathered portions for wider sizes and vice versa for smaller sizes. As for length, that’s self explanatory I think.
Wow, thank you for taking the time to write this. Great explanation and answer to the question.
Debra, the other apron you refer to (not this Star Brand one, but the one from 1944) the booklet is free and in the public domain from the archive: https://archive.org/details/CAT87204704 The USDA “Dresses and Aprons For The Home” . It can be printed out and shared, not in copyright. The images/illustrations ARE the pattern, so you kind of have to almost wing it.
Yes, that’s the booklet I have for the 1944 apron. Thanks for the link to the booklet, that way others can see all the aprons in it. You are right no patterns, just images and illustrations, which some times can be trial and error when sewing them.
thank you for the apron, it looks very neat, easy, and I am start in making it. Thank you again I enjoy your blog.
Thank you! That’s great. Send me a photo if you make one, I’d love to share it.